What Is the Working Procedure of a Rotary Evaporator?
Struggling to understand how a rotary evaporator really works? It seems complex, but its operation is key to efficient solvent removal in many labs like ours.
A rotary evaporator works by increasing the rate of evaporation of a solvent. It does this by reducing pressure, heating the sample, and rotating the flask to increase surface area. This combination allows for gentle and efficient solvent removal.

Understanding this process is not just academic. For us, as manufacturers with over 16 years of export experience, knowing every detail helps us build better equipment. It also helps our customers achieve their research and production goals. Let's explore how this amazing piece of lab equipment does its job so effectively.
What are the key components of a rotary evaporator and their roles in the process?
Ever looked at a rotary evaporator and wondered what each part does? All those glass pieces and controls can seem confusing at first glance.
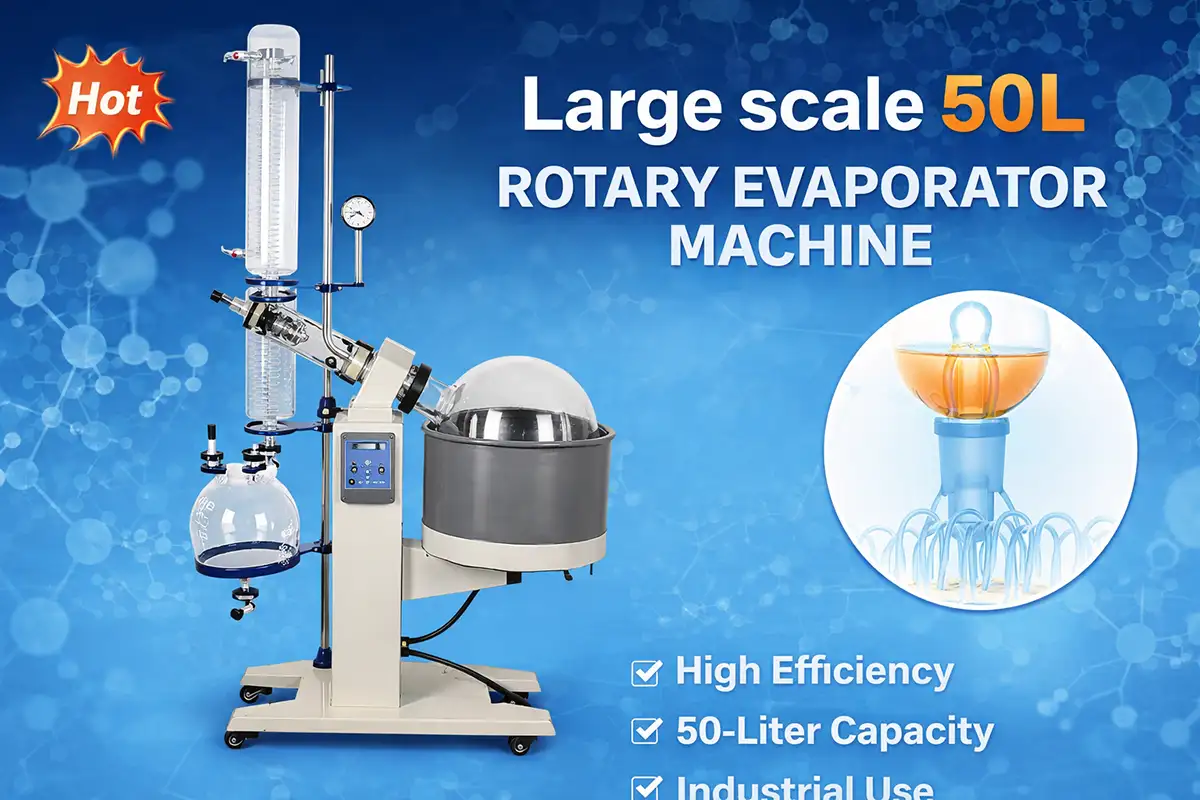
The main parts are the heating bath, rotating evaporation flask, vacuum system, condenser, and receiving flask. Each plays a vital role: heating, increasing surface area, reducing pressure, condensing vapor, and collecting the solvent.

Let's break down these components. I often explain this to new technicians or customers visiting our factory. Seeing it piece by piece makes it much clearer.
1. Heating Bath
This is usually filled with water or oil. It gently heats the evaporation flask. The temperature control is crucial. You want enough heat to encourage evaporation but not so much that it degrades your sample. We ensure our baths have precise temperature control for this reason.
2. Rotating Evaporation Flask
Your sample solution is here. The motor drive rotates this flask. This rotation does two things: it increases the surface area of the liquid for faster evaporation, and it prevents bumping and boiling over by keeping the liquid film thin and evenly heated.
3. Vacuum System
This is essential. It connects to the rotary evaporator and lowers the pressure inside the system. Lower pressure means a lower boiling point for your solvent. This is a game-changer for heat-sensitive compounds. We always emphasize the importance of a good quality vacuum pump.
4. Condenser
As the solvent evaporates, the vapor travels into the condenser. The condenser has a cold surface, often cooled by circulating water or a chiller. The vapor hits this cold surface and turns back into a liquid.
5. Receiving Flask
This flask collects the condensed solvent. This allows you to recover your solvent for reuse or proper disposal, which is important for both cost and environmental reasons. We have seen how important proper collection is in many labs.
Understanding these parts and how they work together is the first step to mastering the rotary evaporator. We have spent years perfecting each component for optimal performance based on feedback from labs worldwide.
How does a rotary evaporator use vacuum to lower the boiling point?
Wondering why a vacuum pump is so vital for a rotary evaporator? It's not just an accessory; it's a core part of the science behind it.
A vacuum system reduces the atmospheric pressure above the liquid in the evaporation flask. With less pressure pushing down, solvent molecules can escape into the gas phase more easily, meaning they boil at a lower temperature.

This principle is really fascinating and incredibly useful in chemistry. I remember in my early days, seeing a solvent boil at room temperature under vacuum was like magic. But it's pure physics!
The Science Explained Simply
Think of boiling as a competition. Liquid molecules want to escape into the air (become vapor). Air pressure above the liquid pushes them down. To boil, the vapor pressure of the liquid (its "push" to escape) must equal the air pressure. By using a vacuum, we reduce the air pressure. So, the liquid doesn't need to get as hot to build up enough vapor pressure to boil. It's like making it easier for the liquid to win the "escape" competition.
Benefits in the Lab
Protecting Sensitive Samples: Many chemical and biological compounds are sensitive to heat. Evaporating solvents at lower temperatures prevents their degradation. This is crucial in pharmaceutical research, for example.
Faster Evaporation: Even if a sample isn't heat-sensitive, lower boiling points mean faster evaporation at a given bath temperature. This saves time.
Efficiency: It's a more energy-efficient way to remove solvents compared to just heating at atmospheric pressure.
As manufacturers, we always stress the importance of matching the right vacuum pump to the rotary evaporator and the application. A good vacuum seal is also critical. Even a small leak can significantly reduce efficiency. That's why our glass components are precision-engineered for tight seals. We often provide training on maintaining these seals to ensure our customers get the best results.
Why is the rotation of the evaporating flask so crucial for efficient evaporation?
Is the spinning flask just for show, or does it actually do something important? It might seem like a simple action, but it's a clever trick!
Rotation continuously spreads the sample into a thin film on the inner surface of the flask. This dramatically increases the surface area available for evaporation and ensures even heat distribution, preventing overheating and bumping.

The rotation is a simple yet brilliant piece of engineering. I've seen labs struggle with older, static evaporation methods, and the difference is night and day when they switch to a rotary evaporator. Here’s a closer look at why it’s so effective:
Maximizing Surface Area
Imagine trying to dry a wet towel. If you leave it crumpled up, it takes ages. If you spread it out, it dries much faster. The same principle applies here. By rotating the flask, the liquid constantly coats the inner wall, creating a large, thin film. More surface area means more molecules can escape from the liquid to the vapor phase at any given time.
Ensuring Even Heating
If the flask were stationary in the heating bath, the liquid at the bottom would get much hotter than the liquid at the top. This could lead to localized overheating, potentially damaging your sample or causing uneven evaporation. Rotation ensures that all parts of the sample are briefly and evenly exposed to the heat from the bath as they pass through the thin film.
Preventing Bumping and Foaming
Bumping is when a liquid superheats and then suddenly boils violently, potentially splashing your sample out of the flask and into the condenser. This is a common problem in static distillation. The constant agitation and thin film created by rotation significantly reduce the risk of bumping. It also helps break up any foam that might form.
When we design our rotary evaporators, the motor and rotation mechanism are key focuses. We aim for smooth, controllable rotation speeds because different applications and solvents might need slightly different settings for optimal results. It’s all part of our commitment to providing versatile and reliable lab equipment.
What is the step-by-step process for operating a rotary evaporator effectively?
Ready to use a rotary evaporator but unsure of the exact steps? A good process ensures safety and good results every time you run it.
The process involves: sample loading, setting bath temperature, starting rotation, gradually applying vacuum, monitoring evaporation, stopping the process by releasing vacuum first, then stopping rotation and heat, and finally, sample and solvent recovery.

Operating a rotary evaporator becomes second nature with practice. Here’s a general guide I often share. Always remember to consult your specific instrument's manual, as there can be slight variations. Safety first!
Preparation Steps:
Check Equipment: Ensure all glassware is clean, free of cracks, and joints are lightly greased for a good seal. Check the cooling water for the condenser is flowing (or chiller is on).
Load Sample: Fill the evaporation flask no more than half full. Overfilling can lead to bumping. Secure it to the vapor duct with a Keck clip.
Set Bath Temperature: Fill the heating bath to the appropriate level. Set the temperature. A common rule of thumb is the "20-degree rule": bath temperature about 20°C higher than the desired vapor temperature, which itself is often set 20°C lower than the condenser coolant temperature.
Operation Steps:
Start Rotation: Lower the flask into the heating bath. Start the rotation. A moderate speed (e.g., 100-150 RPM) is usually good to start.
Apply Vacuum: Slowly and gradually apply the vacuum. Applying it too fast can cause vigorous boiling and sample loss. Watch for smooth evaporation.
Monitor: Keep an eye on the evaporation process. Adjust vacuum or bath temperature if needed. You should see solvent condensing and collecting in the receiving flask.
Shutdown Steps:
Release Vacuum: This is critical! Always release the vacuum *before* stopping rotation or turning off the condenser. Otherwise, solvent or bath water can be sucked back into your sample.
Stop Rotation & Heat: Once the vacuum is fully released, stop the rotation. Turn off the heating bath and raise the flask out of the bath.
Cool Down & Recover: Allow the flask to cool. Then, carefully remove the evaporation flask (with your concentrated product) and the receiving flask (with the recovered solvent).
As a manufacturer, we design our equipment with user-friendly controls and safety features. For example, many of our models have motorized lifts for easy raising and lowering of the flask. Following these steps will help you get the best results and prolong the life of your equipment. I've seen many users significantly improve their outcomes just by refining their operating procedure.
What common mistakes should I avoid when using a rotary evaporator?
Think you've got it all figured out? Even experienced users can sometimes make small mistakes that impact results or safety with a rotary evaporator.
Common mistakes include overfilling the flask, applying vacuum too quickly, not releasing vacuum before stopping rotation, using cracked glassware, or incorrect temperature settings for the bath and condenser. Avoiding these ensures safety and efficiency.

In my years of experience, both in R&D and in supporting customers globally, I've seen a few common pitfalls. Avoiding these can save you a lot of trouble, sample, and even equipment damage.
Top Mistakes and How to Avoid Them:
Overfilling the Evaporation Flask: Why it's bad: Leads to bumping, where your sample violently boils over into the condenser and potentially the vacuum system. You lose product and contaminate your setup.
Solution: Never fill the flask more than half full. For foamy solutions, even less (about one-third full).
Applying Full Vacuum Too Quickly: Why it's bad: Causes sudden, rapid boiling and bumping.
Solution: Introduce vacuum gradually. Watch your sample. If it starts to boil too vigorously, slightly reduce the vacuum or lift the flask from the bath temporarily.
Releasing Vacuum Incorrectly: Why it's bad: If you stop rotation or cool the condenser *before* releasing vacuum, the pressure difference can suck the contents of the receiving flask (or even bath water if the flask is submerged) back into your evaporation flask.
Solution: Always release the vacuum first. This is probably the most crucial safety/operational tip.
Using Damaged Glassware: Why it's bad: Star cracks or chipped glassware can fail under vacuum or thermal stress, leading to implosion (dangerous!) or breakage.
Solution: Inspect all glassware carefully before each use. Do not use damaged items. We always recommend using high-quality borosilicate glass, like the kind we manufacture.
Incorrect Temperature Settings: Why it's bad: Bath too hot can degrade sample. Condenser too warm won't effectively condense solvent, leading to solvent loss into the vacuum pump (bad for the pump and environment).
Solution: Follow the "20-degree rules" as a guideline, or use a solvent boiling point calculator under vacuum to determine appropriate settings. Ensure coolant is flowing properly.
Forgetting Anti-Foaming Agent:Why it's bad: Some solutions tend to foam excessively, leading to loss of sample into the condenser.
Solution: If you know your sample foams, add a tiny amount of anti-foaming agent or use a foam break bump trap.
We build our rotary evaporators to be robust, but user practice is key. By avoiding these common errors, you ensure not only better results but also a safer lab environment and longer equipment lifespan. We try to cover these points extensively in our user manuals and training sessions.
Conclusion
Understanding the rotary evaporator's parts, vacuum science, rotation benefits, correct operation, and common pitfalls helps you master this essential lab tool for efficient solvent removal.
E-mail:
WhatsApp:
Address:
19/F, Block B, Guohong Mansion, Hi-Tech Development Zone, Zhengzhou City, Henan Province, China
Related blogs
You May also like
What Is a Rotary Evaporator? Beginner-Friendly Guide to Rotary Evaporation
Learn what a rotary evaporator is, how it works, and how it solves common solvent removal problems in laboratories and production. Clear, beginner-friendly ex...
Read More
How Do Rotary Evaporators Work? A Practical, Easy Guide for Faster Solvent Removal
Learn how rotary evaporators work in plain English: vacuum + gentle heating + rotation + condensation. See key specs (2L–50L) and how to choose the right rota...
Read More
Rotovap Distillation | Complete Guide to Rotary Evaporators
Learn everything about rotovap distillation, how rotary evaporators work, applications in chemical labs, and why they are essential for efficient solvent remo...
Read More