How to Use a Rotovap for Safe Solvent Removal?
A simple, step-by-step method for choosing the right flask load, setting rotation and vacuum, preventing bumping, collecting solvent, and shutting the system down safely.
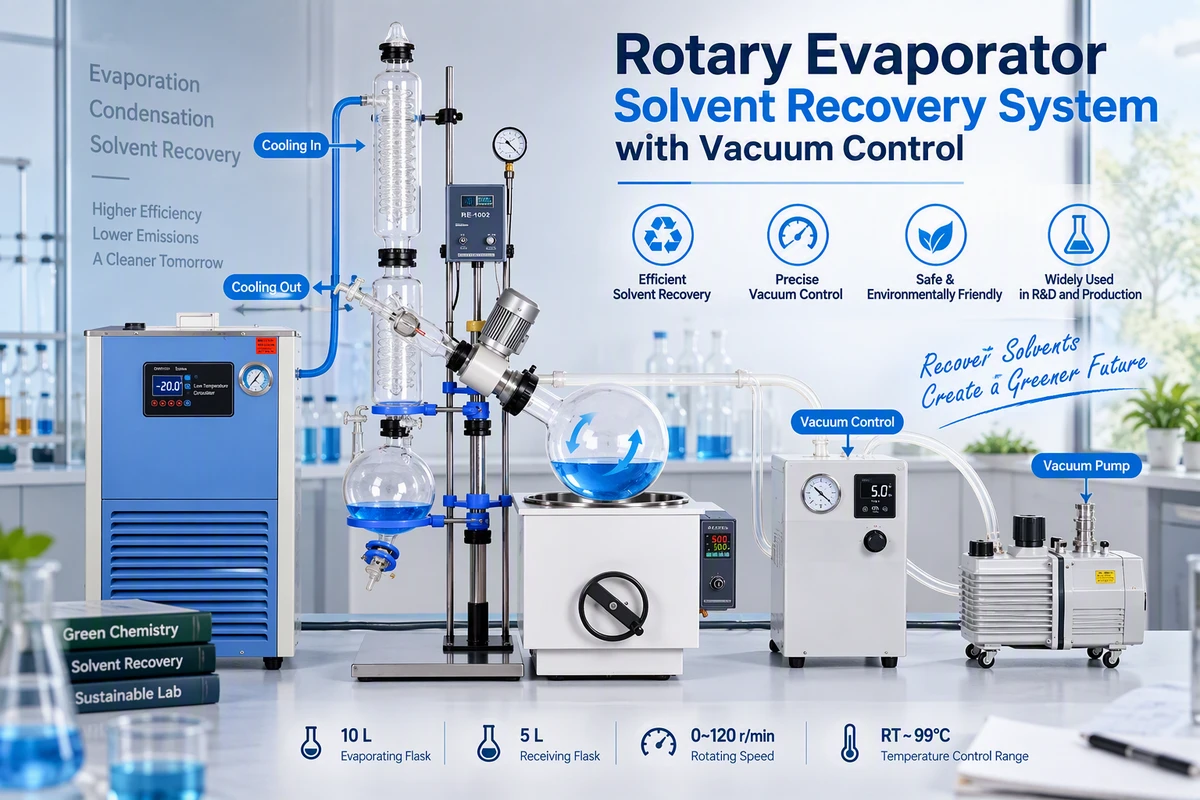
A rotary evaporator, often called a rotovap, removes volatile solvent under reduced pressure. Vacuum lowers the solvent’s boiling temperature, the rotating flask spreads liquid into a thin film, the bath supplies controlled heat, and the condenser turns vapor back into liquid for recovery. This combination can remove solvent efficiently while reducing heat exposure to temperature-sensitive samples. For more background on the process, see this explanation of rotary evaporator chemistry and operation.
Safe rotary evaporation is not achieved by pulling the deepest possible vacuum or using the hottest possible bath. The goal is a stable evaporation rate that the condenser can handle. Solvent should boil smoothly, condensate should remain visible inside the condenser, and vapor should not pass into the vacuum line.
Checks Before Starting the Rotovap
Perform a short inspection before introducing solvent. Cracked or deeply scratched glassware can fail under vacuum. Confirm that every flask is compatible with the joint size, properly seated, and secured with the correct clip or clamp. Examine PTFE and fluoro-rubber seals for wear, chemical swelling, or contamination. A damaged seal causes unstable vacuum and may expose the pump to solvent vapor. A visual guide to rotovap parts and their functions can help identify each component.
Review the solvent safety data sheet and confirm solvent compatibility with seals, tubing, bath fluid, and pump.
Work in a functioning fume hood or another properly engineered ventilation enclosure.
Wear splash goggles, a lab coat, closed footwear, and chemically suitable gloves.
Check the evaporation and receiving flasks for chips, star cracks, and scratches.
Confirm that condenser coolant lines are secure and arranged to avoid kinks.
Place a trap between the condenser and pump when solvent carryover is possible.
Keep ignition sources away from flammable solvent and use appropriately rated equipment.
Why should vacuum be increased gradually?
My answer: Gradual vacuum gives the liquid time to reach controlled boiling. A sudden pressure drop can trigger violent bumping, foam carryover, sample loss, condenser flooding, and solvent entry into the pump.
How to Use a Rotovap: Step-by-Step Procedure
Load and secure the evaporation flask
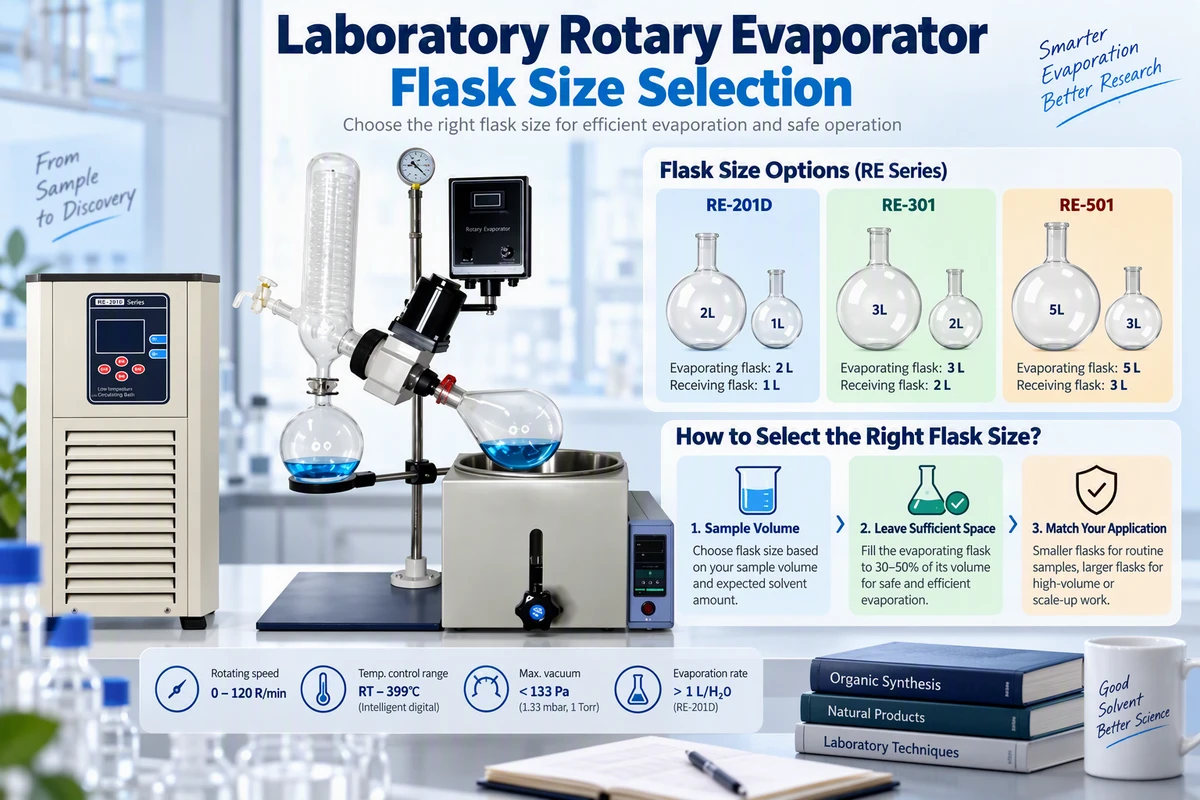
Transfer the solution into a round-bottom evaporation flask. As a practical starting point, keep the normal load at or below one-half of flask capacity; foaming solutions may require a much smaller load. Ensure the outside of the joint is clean, connect the flask to the vapor duct, and secure it with the correct clip. Do not use a flask that is too small for the liquid volume.
Start condenser cooling
Turn on the recirculating chiller or cooling water before evaporation begins. Coolant normally enters at the lower condenser port and exits at the upper port, which helps fill the condenser jacket completely. Choose a coolant temperature that can condense the solvent at the selected pressure. Very volatile solvents often need active chilling rather than tap water.
Set the bath temperature
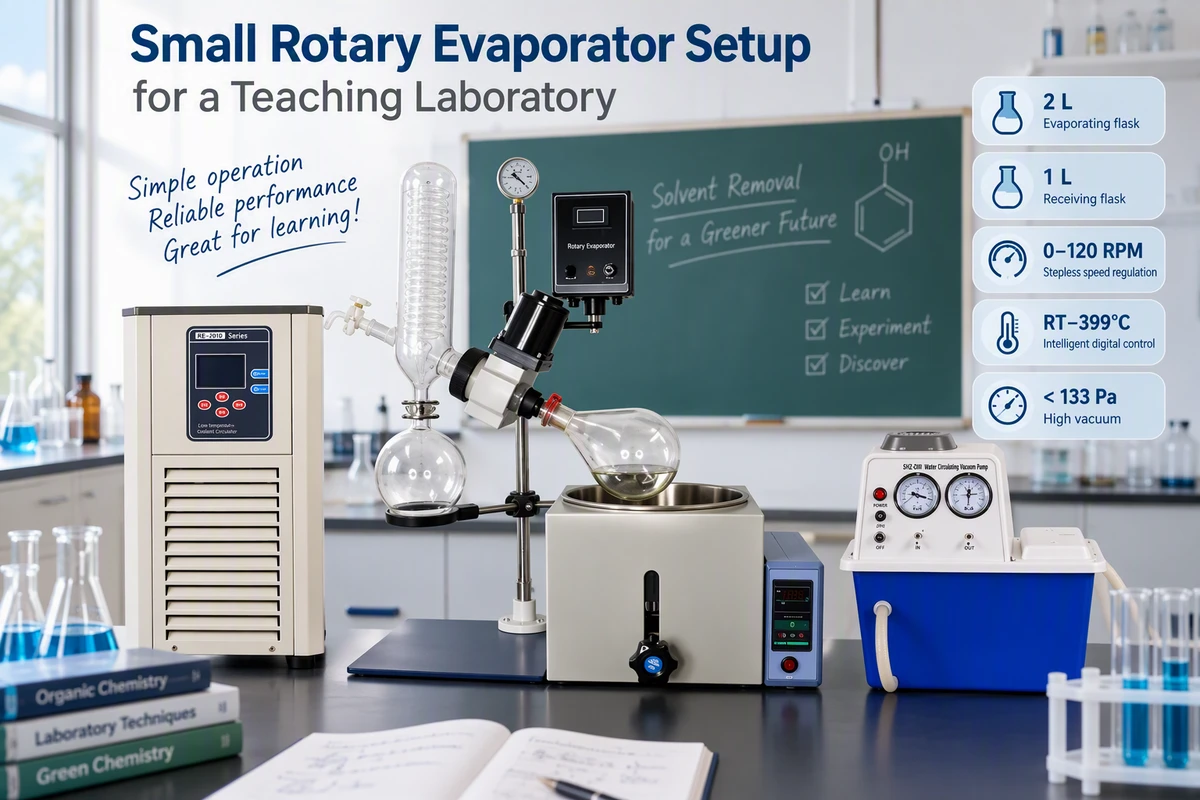
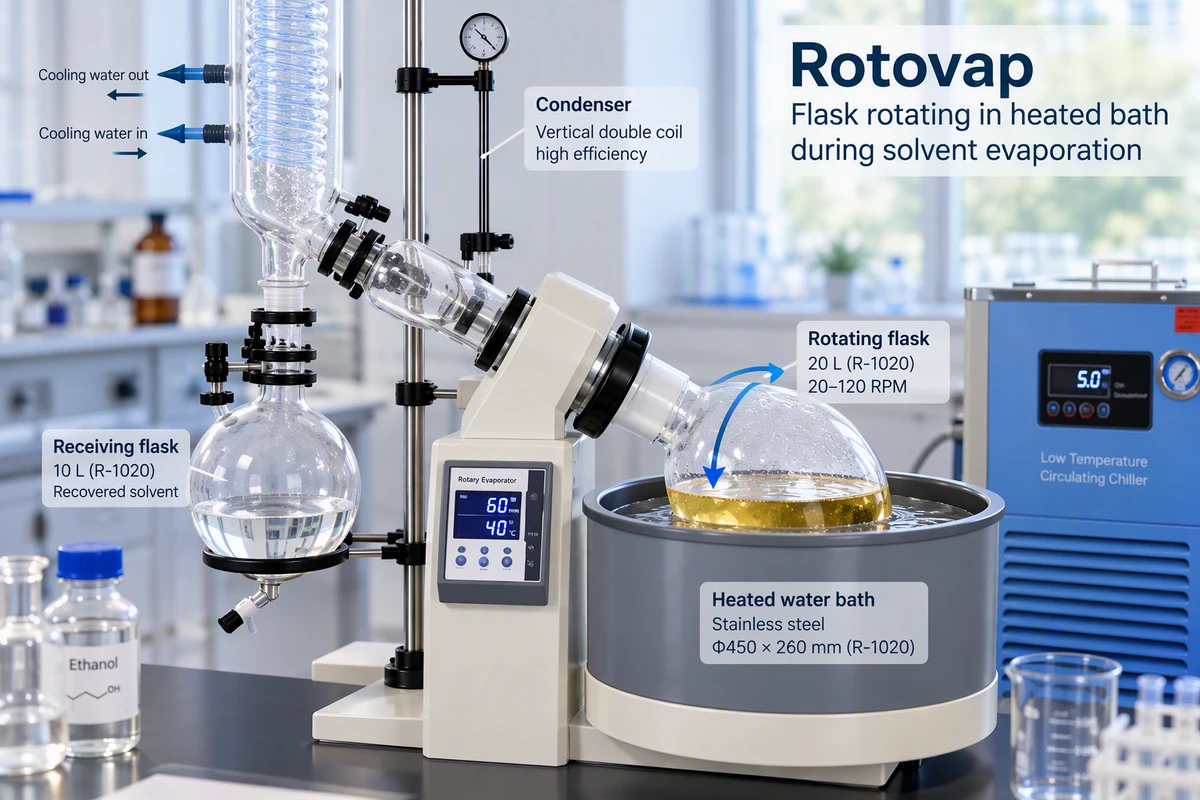
Fill the bath to the specified safe level and set a moderate temperature based on the solvent and sample stability. Start low and raise temperature only if condensation remains complete. Never heat a water bath beyond the equipment’s rated range, and use suitable oil only when the manufacturer permits oil-bath operation. Uploaded equipment specifications include intelligent digital control, with some small models rated from room temperature to 399°C; that equipment ceiling is not a recommended solvent setting.
Begin flask rotation
Start at a low speed, then increase until a stable liquid film forms on the inner wall without splashing into the vapor duct. Many systems in the listed equipment range provide stepless control from 0–120 rpm, while R-series configurations offer ranges such as 10–140 rpm. The best speed depends on flask size, viscosity, fill level, and mechanical stability—not simply the maximum dial setting.
Lower the rotating flask into the bath
Use the manual or electric lift to immerse the lower portion of the flask. Keep the flask clear of the bath bottom and sides. Verify smooth rotation and leave enough clearance for safe lifting. Models in the provided range offer lift travel from about 120 mm to 220 mm, so setup should be checked before vacuum is applied.
Apply vacuum slowly and watch the boil
Close the vent gradually or lower the pressure in controlled steps. Pause as the first bubbles appear. If the sample rises rapidly, admit a small amount of air, raise the flask, or reduce bath heat. Once boiling is stable, adjust pressure so that vapor condenses mainly in the middle section of the condenser. A vacuum controller provides more repeatable control than regulating solely with a pump valve.
Monitor recovery and finish gently
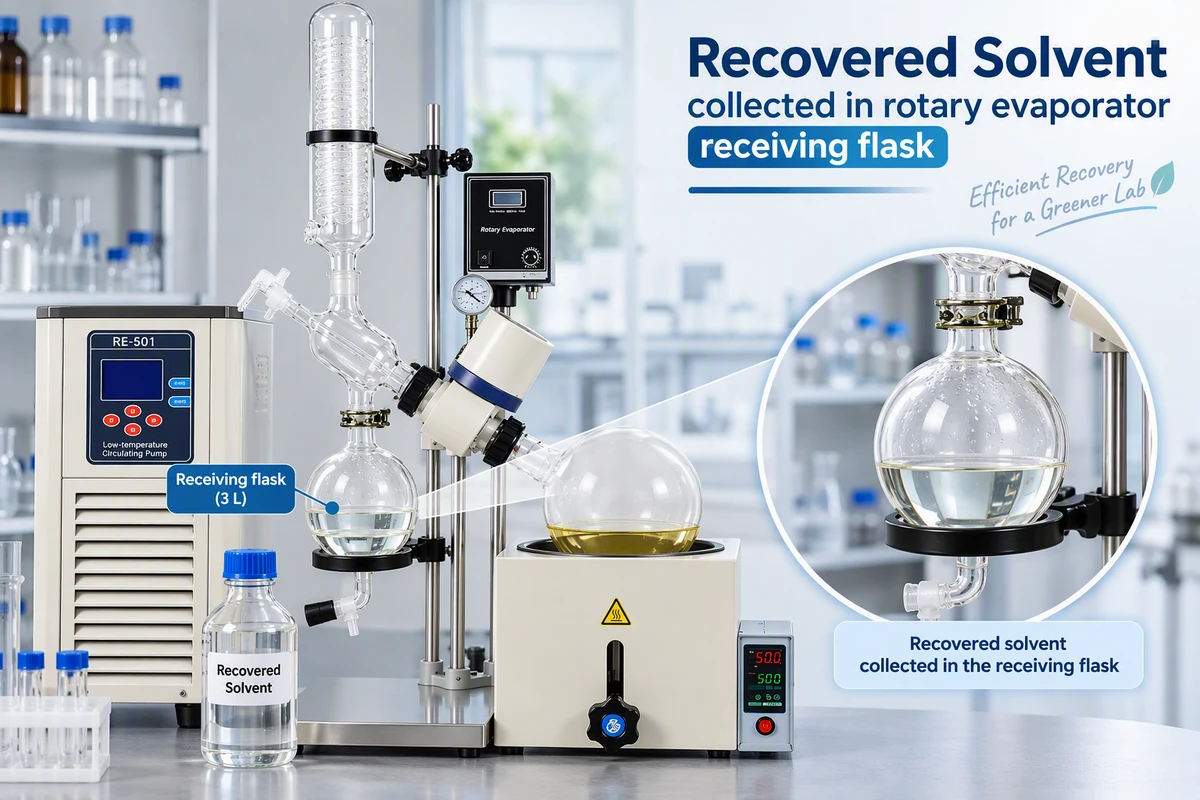
Watch the receiving flask level, bath temperature, system pressure, coolant temperature, and condensation pattern. Empty the receiver only after isolating and venting the system. Near the end, evaporation usually slows; avoid forcing the final traces out with excessive heat and vacuum if the product is heat-sensitive or prone to foaming.
What indicates a well-balanced rotovap process?
My answer: A thin, even liquid film; smooth boiling; a stable pressure reading; visible condensate inside the condenser; and steady collection in the receiver are the clearest signs. Vapor escaping toward the pump means cooling, pressure, feed load, or heat input needs correction.
Practical Rotovap Settings and Capacity Guide
No single temperature-and-pressure combination fits every solvent. Use validated boiling-point data, the solvent safety data sheet, and an established laboratory procedure. The equipment ratings below help with model selection, but they do not replace solvent-specific process development.
| Model group | Evaporation flask | Receiver | Rotation | Water evaporation rate | Typical scale |
|---|---|---|---|---|---|
| RE-201D | 2 L | 1 L | 0–120 rpm | >1 L/h | Small laboratory batches |
| RE-301 | 3 L | 2 L | 0–120 rpm | >1.5 L/h | Routine laboratory use |
| RE-501 | 5 L | 3 L | 0–120 rpm | >1.5 L/h | Medium lab batches |
| RE-1002 | 10 L | 5 L | 0–120 rpm | >3 L/h | Pilot-scale recovery |
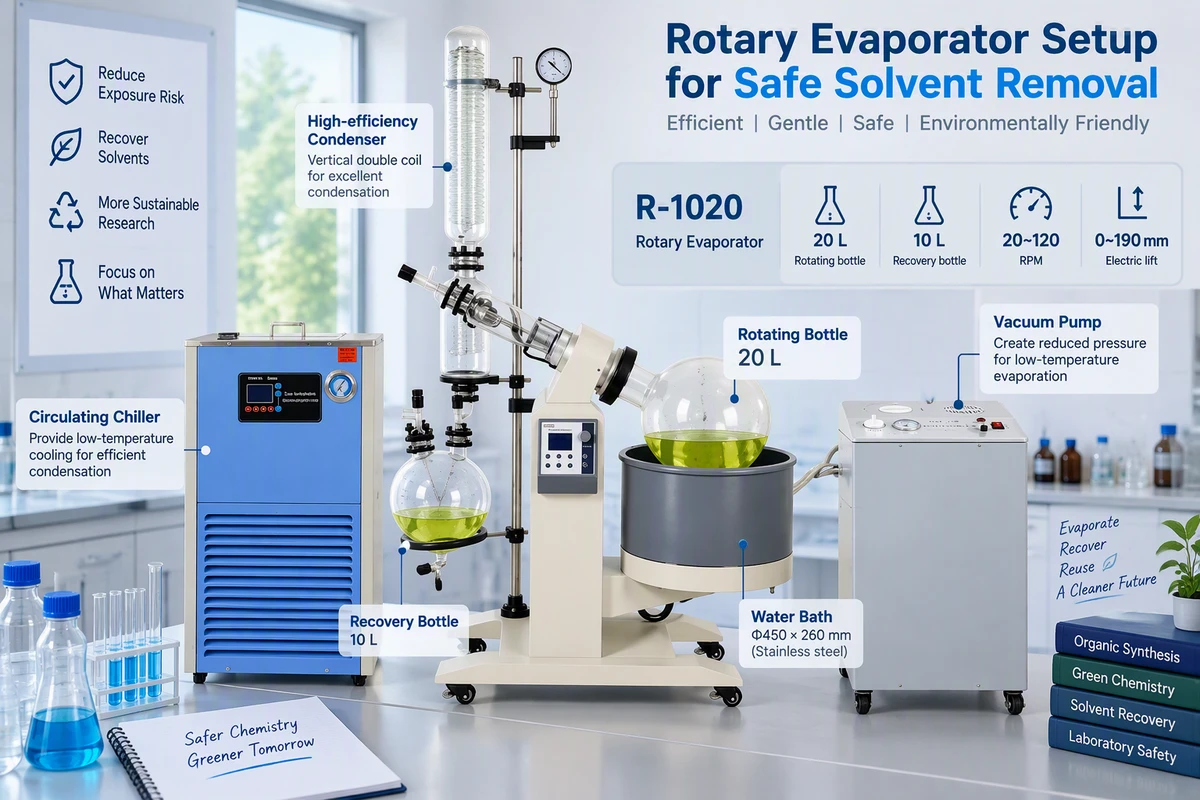
| RE-2002 | 20 L | 10 L | 0–120 rpm | >5 L/h | Process development |
| RE-5002 | 50 L | 20 L | 0–90 rpm | >9 L/h | Large-batch processing |
Published evaporation rates are measured with water under specified test conditions. Actual solvent throughput varies with solvent properties, feed concentration, bath temperature, pressure, coolant performance, flask loading, and ambient conditions.
For reliable separation, bath heat input and condenser removal capacity must stay in balance. A useful process principle is to maintain a meaningful temperature difference among the bath, boiling vapor, and coolant. Treat any rule of thumb as a starting point, then validate it against sample stability and condenser performance.
Safe Rotovap Shutdown Sequence
Raise the flask out of the bath or turn off bath heat when the target concentration is reached.
Isolate the vacuum source so solvent vapor is not pulled unnecessarily toward the pump.
Vent slowly to atmospheric pressure. Never force glassware apart while the system remains under vacuum.
Stop rotation only after pressure is equalized and the flask is in a secure position.
Remove and cap the product flask using suitable gloves if the glass is warm.
Empty the receiving flask into a compatible, labeled solvent container.
Turn off cooling last after residual vapor has been condensed, then clean and inspect the system.
When is solvent removal complete?
My answer: Completion is defined by the process requirement, not by an empty condenser. A stable sample mass, validated residual-solvent result, target concentration, or established endpoint should be used. A sudden lack of condensate alone may also indicate a leak, exhausted coolant capacity, or poor vacuum.
Common Problems and Fast Corrections
Choosing a Rotovap for Safer Solvent Removal
Select flask capacity around realistic working volume rather than total flask volume. A 10 L flask is not normally intended to hold 10 L during active evaporation. Also evaluate condenser surface area, receiver capacity, lift travel, seal chemistry, vacuum control, bath power, maximum rated pressure, and available electrical service. Small RE-series models list bath powers from 1,200 to 1,500 W, while 10–50 L RE systems list 3,000 to 9,000 W. Larger heat input increases potential throughput only when vacuum and condenser capacity are matched.
Useful safety-oriented features include a motorized lift, automatic lift or rotation stop during a power failure, controlled vacuum venting, over-temperature protection, dry-run protection for chillers, coated glassware options, and shields. For scale-up, assess room ventilation, flammable-liquid controls, grounding and bonding requirements, waste handling, and local electrical classification with the site safety team.
The Essential Operating Principle
Safe solvent removal depends on balance: moderate bath heat creates vapor, controlled vacuum sets the boiling condition, rotation forms a stable film, and sufficient cooling captures the vapor. Start gently, change one setting at a time, watch the condenser, and always vent before touching the glassware. That disciplined sequence protects the sample, the operator, the vacuum pump, and the rotary evaporator.